Jellyfish Shop - Web App Crash Course - 2. Frontend
This article links to many amazing tutorials from FireShip YouTube channel. Without doing so it will be 4 times longer. Huge kudos for creating all of them!
Welcome back, the shopfront and selling chamber look a bit old. Let’s rebuild to its old glory, the glory it deserives!
In this article, we’ll explore the essential steps and techniques required to build a compelling frontend for your web application. When it comes to the graphical part of the app, tweaking its look make eat enormous amount of your time. Keep that in mind. And we have just one life to do everything (at least this is what we think so) Here we won’t focus on some sophisticated styling tehniques. Contrarny we will try to save the time (a lot of time) by using ready buidling blocks. But yet well looking page. (remeber using kitbashing your visual layer is not cheeting, actuallt there is not cheeting when it comes to )
Task description
The plan is to create frontend consisting:
- Landing page - A landing page is a single web page designed to achieve a specific goal, such as capturing leads or promoting a product or service. It serves as a focused entry point where visitors are directed to take a desired action, increasing the chances of conversion and achieving marketing objectives. It will have all usuall landing page elements:
- Navbar with buttons leading to sections below, as well as buttons that will take users to jellyfish trading platform
- Hero sections with some customer hook text
- Features section presenting most important aspects of the shop
- Call to action section that will have a link inviting the user to register a new account
- Statistics section with some numbers
- Testimonials with some cool reviews of the shop
- Contact form allowing users to send us an email
- And finally footer with page map
- Shop counter aka Jellyfish trading platform - Separate page on which logged users will be able to check store inventory, buy or sell some jellyfishes. Also we will put there some graphs and user profile settings.
- Web app - Jellyfish trading platform but in form of the mobile app that can be installed on the smartphones.
Looks like a lot of work, right? Let’s start then!
Setup
Prerequisites
- Download and install Node.js
- If you are using Visual Studio Code as your code editor I recommend to install these extensions:
- Tailwind CSS IntelliSense
- vscode-icons
Initial project creation
Good practice is to start every new project by creating version controlled directory that will hold all project files. I will use GIT but you choose what you like of course.
Go to your GIT provider system (GitHub. GitLab, etc) and create new repository. Then clone it to the folder of your choice.
-
Open command line
-
cd <PATH_TO_FOLDER_WITH_YOUR_PROJECTS> -
Clone repository
git clone <LINK_TO_YOUR_REPOSITORY> -
cd <YOUR_REPOSITORY_NAME> -
Create folder for frontend project
mkdir frontend -
cd frontend -
Create new Next.js app
npx create-next-app .
You will be asked to set some settings. I suggest to use these:
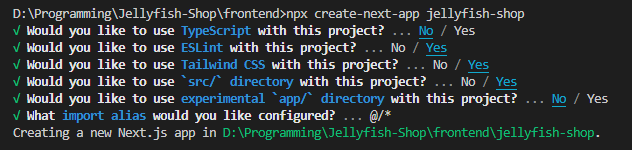
Run locally to check if it works npm run dev and open http://localhost:3000/ in your internet browser.
What is amazing in frontend development is that most of the frameworks have lightning-fast code hot reload. You can introduce change to the code and it will be reflected in the browser imediately, no need to close it and rebuild!
<Describe project files and directories here https://www.youtube.com/watch?v=Sklc_fQBmcs&t=211s&ab_channel=Fireship>
_app.js - main entry point into the app. By default it points to index.js file.
Every file or page in the application has to have one default export function. Only in this way next.js will know how to construct the page from these individual blocks.
Routes (endpoints)
Subpage
Let’s create our first subpage.
In pages folder create jelly.js file and fill it:
Jelly.js
|
|
Dynamic subpages
Next.js can “read” the url as it contains parameters and use them to adjust rendered component. To explain it let’s create 📓 Jellyfish-onomicon 📓.
- In
pagesfolder add another folder calledjellyfish_onomiconwith two files. - Create
index.jswith:index.js
1 2 3 4 5 6export default function JellyfishOnomicon() { return <h1>Welcome to the infiniteness of the Jellyfish-onomicon, where the realms of dark magic intertwine with the captivating elegance of jellyfish</h1> } - Create
[name].jswith:[name].js
1 2 3 4 5 6 7 8import { useRouter } from 'next/router' export default function Jellyfish() { const router = useRouter() const { name } = router.query return <h1>Jellyfish: { name }</h1> }
Thanks to this setup a single dynamic component is used to display different subpages.
Go to browser and check:
- http://localhost:3000/jellyfish_onomicon
- http://localhost:3000/jellyfish_onomicon/MoonGlow
- http://localhost:3000/jellyfish_onomicon/PinkPuff
- http://localhost:3000/jellyfish_onomicon/WHATEVER
💡 You can add code that calls ChatGPT and asks to generate random description from the jellyfish name, in this way creating really infinite compendium imaginary jellyfish. You can even ask AI to generate their images, fetch them and display.
Public static data
Next.js has a public folder. Everything put there is accessible directly after domain name, eg. http://localhost:3000/MyFile.png.
However, it is recommended to put a static folder inside public to keep the assets in it with all assets bundling and compressing benefits.
Let’s prepare some data. Create static folder and jellyfish_onomicon_data folder with two json files there. This will be useful in the next section of this course.
MoonGlow.json
|
|
PinkPuff.json
|
|
Now you can get contents of these files just by going to:
- http://localhost:3000/static/jellyfish_onomicon_data/MoonGlow.json
- http://localhost:3000/static/jellyfish_onomicon_data/PinkPuff.json
API routes
Let’s test it by creating some data that will be returned from the frontend. This will be useful in the next section of this course.
- In
apifolder create folderjellyfish_onomicon_data - Inside it create two json files:
These files can be accessed simply by going to:
Data fetching
Generally there are two types of web pages (and apps)
- Static - they display content that is not changing. Eg. landing page, portfolio or blog.
- Dynamic - they are building the page in real time by adding to the static elements fetched from the server. Eg. Social media pages, Banking portals, e-commerce stores, Stock exchange monitoring websites or apps, and many more. So in example of e-commerce stores static element is the table in which items are listed, but item data has to be fetched from backend server.
In classic approach server is sending frontend whole source to the client’s (user’s) browser, and the browser is responsible for executing javascript code to fetches the data and then converting everything to html code (rendering), and finally displaying in the window.
This has several drawbacks
Alternatives that next.js provides are Server Side Generation (SSG) and Server-Side Rendering (SSR). Let’s extend Jellyfish-onomikon to show how they work.
Server-Side Generation (SSG)
In this approach server generates (prerenders) HTML code during build time and then sends the same code to all users. Note that makes sense only for static pages and is an ideal solution for those that have to be constructed using some external data, but only from time to time.
Let’s implement SSG in our Jellyfish-onomicon. For this our json files in the static folder will be useful. Basically we will fetch them in the dynamic [name].js component using getStaticProps function.
When site is built, this function will be called by Next.js and send the result as props to the component itself. Then we will be able do display this data.
[name].js
|
|
There is one crucial thing to keep in mind. Since in SSG everything is pregenerated we need to inform Next.js how many pages will be associated to the dynamic route. Otherwise it simply won’t know how many of them to be generate.
[name].js
|
|
To fix this issue we need to provide that information using getStaticPaths function. It should return array of every route that has to be generated for this dynamic URL.
Check:
http://localhost:3000/jellyfish_onomicon/MoonGlow
And this should return 404 page: http://localhost:3000/jellyfish_onomicon/NonExistingJelly
If you load one of the pages of Jellyfish-onomicon and see the source code (F12 for developer options) you can notice that code is plain HTLM, there is no JavaScript.
Server-Side Rendering (SSR)
In this approach not the client’s browser but the sever is responsible for constructing the page. When finished, prerendered data is send to the user and the only task of its browser is to display it. In other words, whole page is generated on the server when requested by the user and send back to them.
There are several benefits
This an ideal solution for dynamic pages.
To use SSR we just need to change the name of function getStaticProps with getServerSideProps. Contents stay the same!
The only difference is that instead on build this function will be run on each client request (and of course when using SSR getStaticPaths function is not needed anymore).
Components
Ok we just escaped the realm of Next.js with the precious knowledge. Now let’s talk about everything React.
Watch this great overview:
As you have seen,React is here to provide a convinient way to build frontend out of ready or custom reusable components that combine HTML and JavaScript, as well as simplify the way those componetnes can share state between each other and respond to its changes using so called hooks.
It is important that page is also a component that is built from multiple component that can be build out of multiple components and so on. So components can be embed inside other components.
This is done using JSX, React version of HTML
Each component is just a function that returns JSX code, which looks identically as HTML but additionally it allows to add other components in it.
This function can return only one element. So it you want to return mulitple you have to wrap them into fragment like so:
return (<>
    <p>Jelly</p>
    <p>Fish</p>
</>)
https://youtu.be/hQAHSlTtcmY https://github.com/WebDevSimplified/Learn-React-In-30-Minutes
Icons
Every moden app needs some icons. Thanks to amazing utility called React Icons those can imported directly from different icons libraries as React components. You can browse vast collections of icons to choose from here
- Go to frontend project folder
cd frontend - Install React Icons library
npm install react-icons --save - No need to download any graphic files, just import icons in the code:
[name].js
1
2
import { AiFillHeart } from 'react-icons/ai'; <AiFillHeart size="32" />
Hooks
Let’s add a possibility to give a like to the jellyfish in the Jellyfish-onomicon.
[name].js
|
|
Now try clicking heart icon and see what happens.
When you refresh the page, data saved in likesCount will be lost.
Styling
The biggest problem of CSS styling is that it is time consuming and not very fast.
There are two major solution to this problem.
- Use some highlevel UI library (eg. Bootstrap, MUI, Chakra UI) which shipps to you app ready to use and pre stylized components that look nice
- Use Tailwind CSS which is something in between - a huge collection of CSS utility classes that you can apply directly on your HTML tags. However it does not provide prebuild components. Thanks to it we can skip assigning a class name to the tag and defining huge style list in spearate CSS file. Main idea is to stylize the UI directly in HTML. The ulitmate tandem here is Tailwind with component-based JavaScript libraries (in our case React)
Make sure to watch this great overview:
And to get even better understanding watch this:
If you were following the course precisely, Tailwind should be already installed in the project. In case you skipped its installation during Next.js project creation, or you are using some other library than React, you would need to install manually. Instructions can be found here
When it comes to styling we can use 4 strategies (you can mix them however you like):
- class=“myButtonStyle” + CSS
- style="—"
- className=“tailwind shit”
Color palette
It is very handy to define colors used throughout whole application in one place and make all component reference it. This concept is called “color palette”.
To create it go tailwind.config.js:
tailwind.config.js
|
|
Global styles
In tailwind we can also create and use our custom global classes using not plain CSS but Tailwind utilities.
globals.css
|
|
Now you can use this class as follows:
<div className='jellyfish-card'>
Ready UI building blocks
Here you can find completely free and open-source components, page sections, templates, icons packs, and other frontend assets I gathered and consider good.
Value in the square brackets shows the number of stars there kits have on GitHub.
Heart is a special recognition award given by one-person jury consisting of myself.
Remeber that you can mix all of them freely.
Tailwind libraries with components, page sections, templates
- daisyUI [22k+] - The most popular Tailwind component library. Missing page sections
- ❤️ HyperUI [5k+] - Great collection of various components and page sections
- ❤️ Tailwind Elements [11k+] - Vast collection of fine components, sections and templates
- Tailblocks [8k+] - Extensive set of basic page sections
- Flowbite [5k+] - Popular and rich library of components and page sections (some paid)
- ❤️ Merakiui [2k+] - Collection of great page sections. Missing some components
- ❤️ Kometa UI Kit [??] - Collection of great page sections. Missing some components
- Treact [??] - Collection of premade landing pages and their page sections
- FloatUI [1.7k+] - Professionally looking components, page sections and templates
- kutty [0.7k+] - Large and ready library of appealing components and page sections
- headlessUI [21k+] - Limited set of completely unstyled components
- Tailwind UI [??] - Ready components and page sections (some paid)
- Mamba UI [0.5k+] - Basic-style, ready components, page sections, and few page templates
Tailwind templates (without additional components)
- Tailwind starter kit [5k+] -
- Landwind landing page [0.3k+] - Landing template page built for SaaS and product websites
- TailAdmin [0.5k+] -
- Windster dashboard [0.7k+] - Admin dashboard layout with responsive sidebar layouts
- Open landing page [2.7k+] - Ready to deploy landing page
- Mosaic dashboard template [1.7k+] - Ready to deploy dashboard page
- Ross Topping templates [0.3K+] - Collection of simple templates
Icons
- ❤️ React Icons [10k+] - Aggregator of ~30 high quality icons pack that allows to import them as React components. If you are not doing any crazy styling that requires some ununusal icons, React Icons will serve all your needs
- freeicons.io [??] - +16k icon packs, in every style you can imagine
Miscellaneous
- ApexCharts [12k+] - Modern charting library used to create beautiful and interactive visualizations for web pages
- ❤️ visx [17k+] - Pack of exceptional, next-level widgets
- Awesome Tailwind - Huge list of even more Tailwind resources and more
- Tailwind Cheat Sheet - List of all Tailwind keywords
Visual editor
Work smarter, not harder! This is what finest jellyfish hunters usually say!
(I made it up, I have no idea if they say that…)
So we are composing user interface by writing code, adding styling properties, changing the order of elements and all of this is done in the text editor! To see what the changes you in introduce do, the project has to be recompiled and displayed in the browser window. Purists will say that this is the only proper way. I would say “I don’t have time for this XD”.
Alternative is to use a visual editor, a tool in which you can change the layout of the components by dragging and dropping them with a mouse!
What a genius idea!
To start I suggest using Codux that will empower your Visual Studio Code with visual editing capabilities.
For tutorial how to install and use it check this: